Moving away from the trackpad or mouse is not a one time toggle though - it's a process that takes time for everyone. Let's get started on macOS and see what tools are out there to help you along your journey.
2023 January update
I've mentioned Vimac back in 2020. It was recently rewritten by the author and re-branded as Homerow. You should check it out if you're keen to master keyboard navigation across all macOS apps.
Learn Keyboard Shortcuts
This one is too obvious, still often overlooked: if you repeatedly reach for the mouse to do a particular action, try to find the relevant shortcut in your app.
For system-wide hotkeys, check out the official Mac keyboard shortcuts.
Browse commands
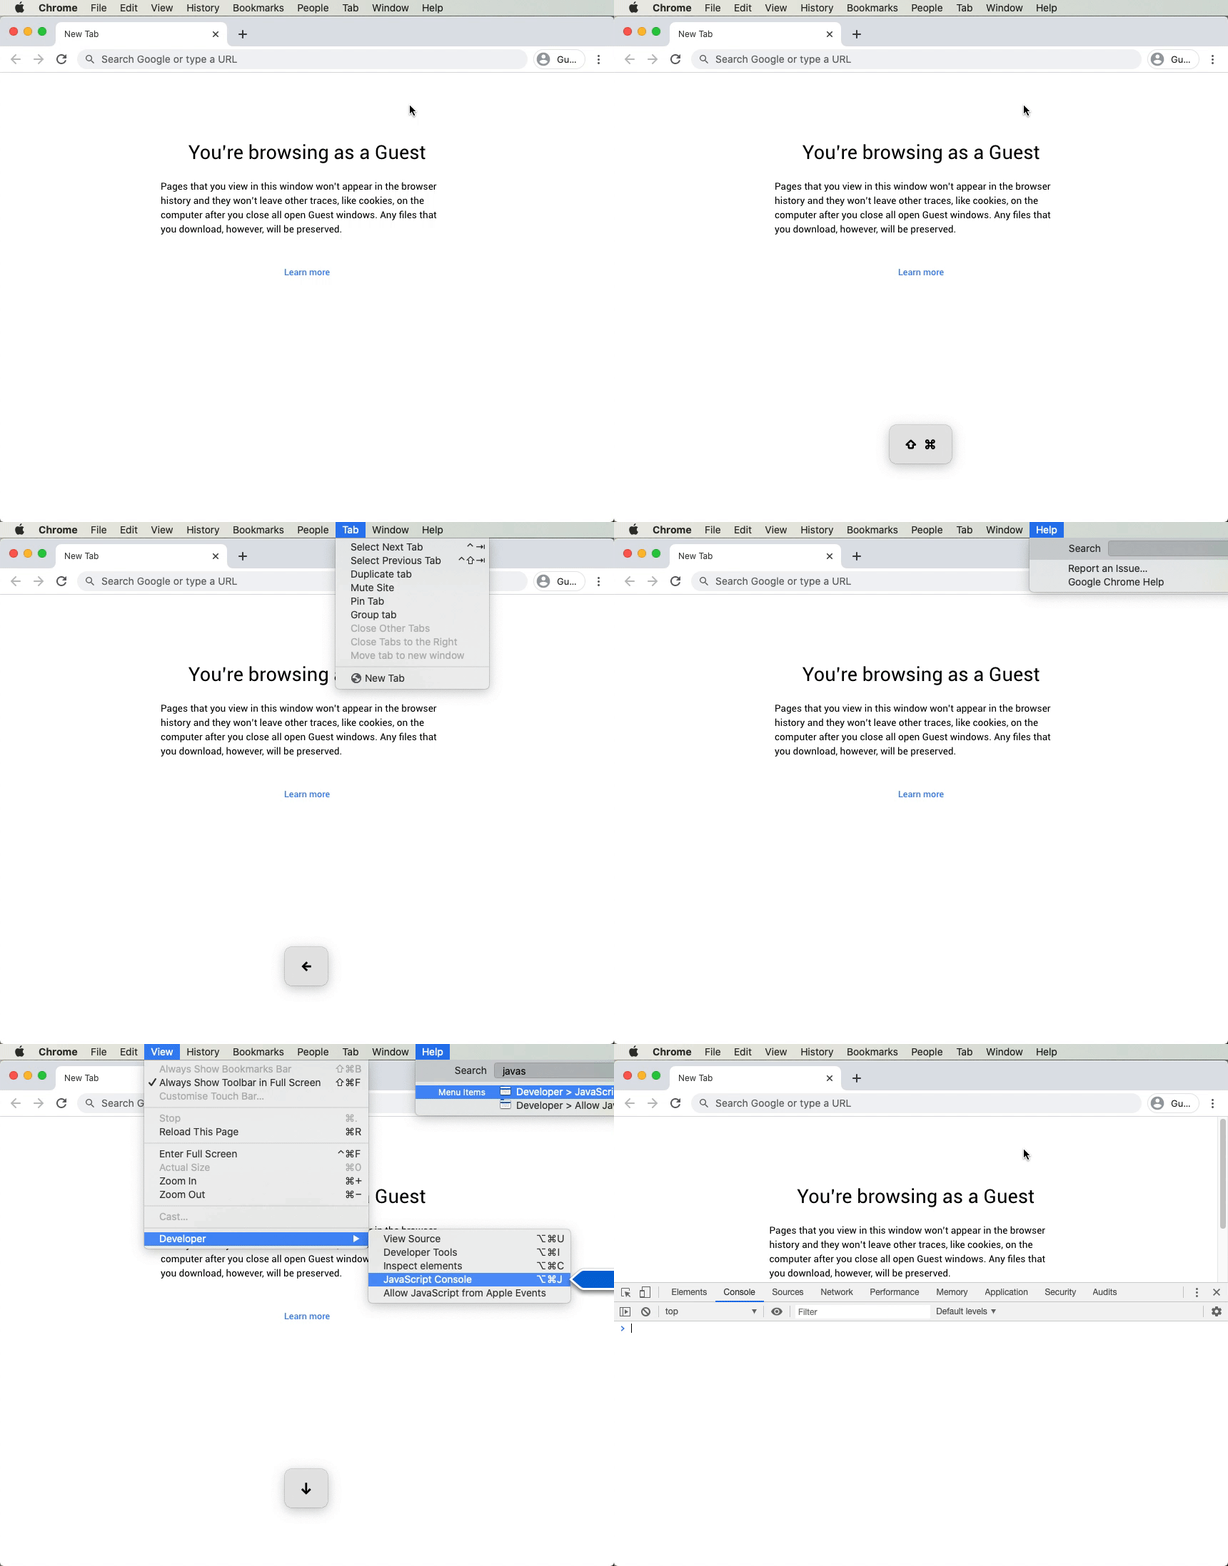
A powerful key combination you might want to keep in mind is ⌘⇧\: it lets you search all the shortcuts of the current app plus run the commands, or simply navigate the menus with the keyboard.
Use the
⌘⇧\shortcut to navigate app menus and run commands
CheatSheet
There is a free app called CheatSheet that can show you all the shortcuts available in the current window by holding the command ⌘ key.
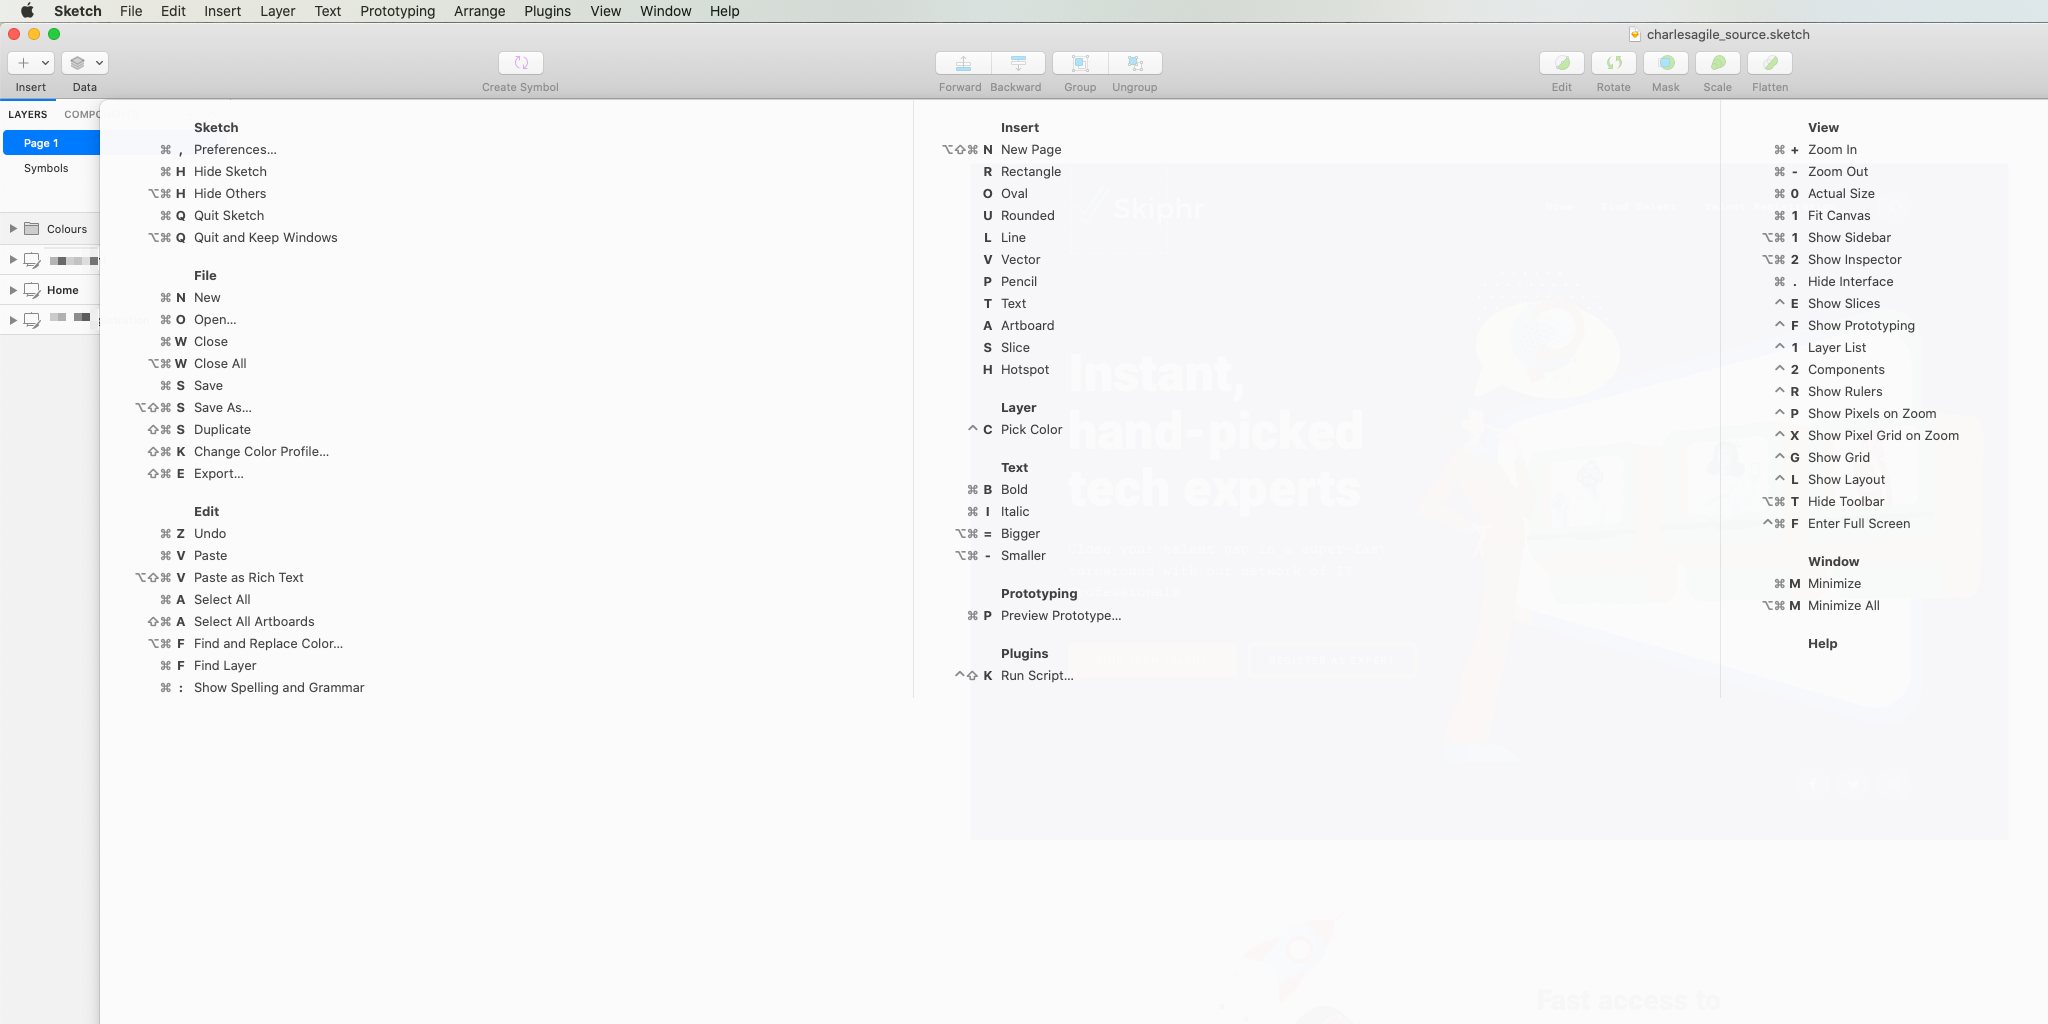
You can even print the hotkey list for future reference if you like.
Take it easy
You might be overwhelmed at first, but remember: learning takes time. Don't try to memorise every key combination at once. Just let the ones you often use become second nature, then pick up new ones as you go.
The Scary but Powerful: Vim mode 🙀
Vim is the infamous editor you can't get out of, right? Well, I'm not saying you should use Vim as your primary editor. There are better alternatives nowadays IMO, although it's still the most powerful text editor probably and it's not that hard to pick up.
What I'm suggesting though, is to learn the basic movement and command keys of Vim mode. It's a brilliant, comfortable and efficient way of using the keyboard. It is probably the fastest way to deal with text editing and writing source code. It has been around for 28 years since Vim came out (!), and seems like there are no significantly better alternatives for now.
You can get started with learning just a handful of shortcuts:
- Move left, down, up, right:
h,j,k,l. - Go to the top of the document:
gg(Gtakes you to the end). - Go to insert mode so you can type any text:
i. - Exit insert mode and go back to "navigate" again:
ESC.
Don't believe the hype; it's not that difficult 🤓
There are countless more tricks, shortcuts and all sorts of magic you can do with Vim. The main thing to appreciate though is that the modal nature of Vim mode allows you to keep your hands on the home row of the keyboard so that you can touch-type without interruption. You will need to pick up the mouse a lot less often.
As you'll see below, a lot of new solutions borrow from Vim's keybindings. Even Gmail has matching hotkeys!
Vim mode in VS Code
Probably all source code editors and IDEs support Vim mode in some form. I use VS Code nowadays (who knew?) and probably the first extension I have installed was VSCodeVim.
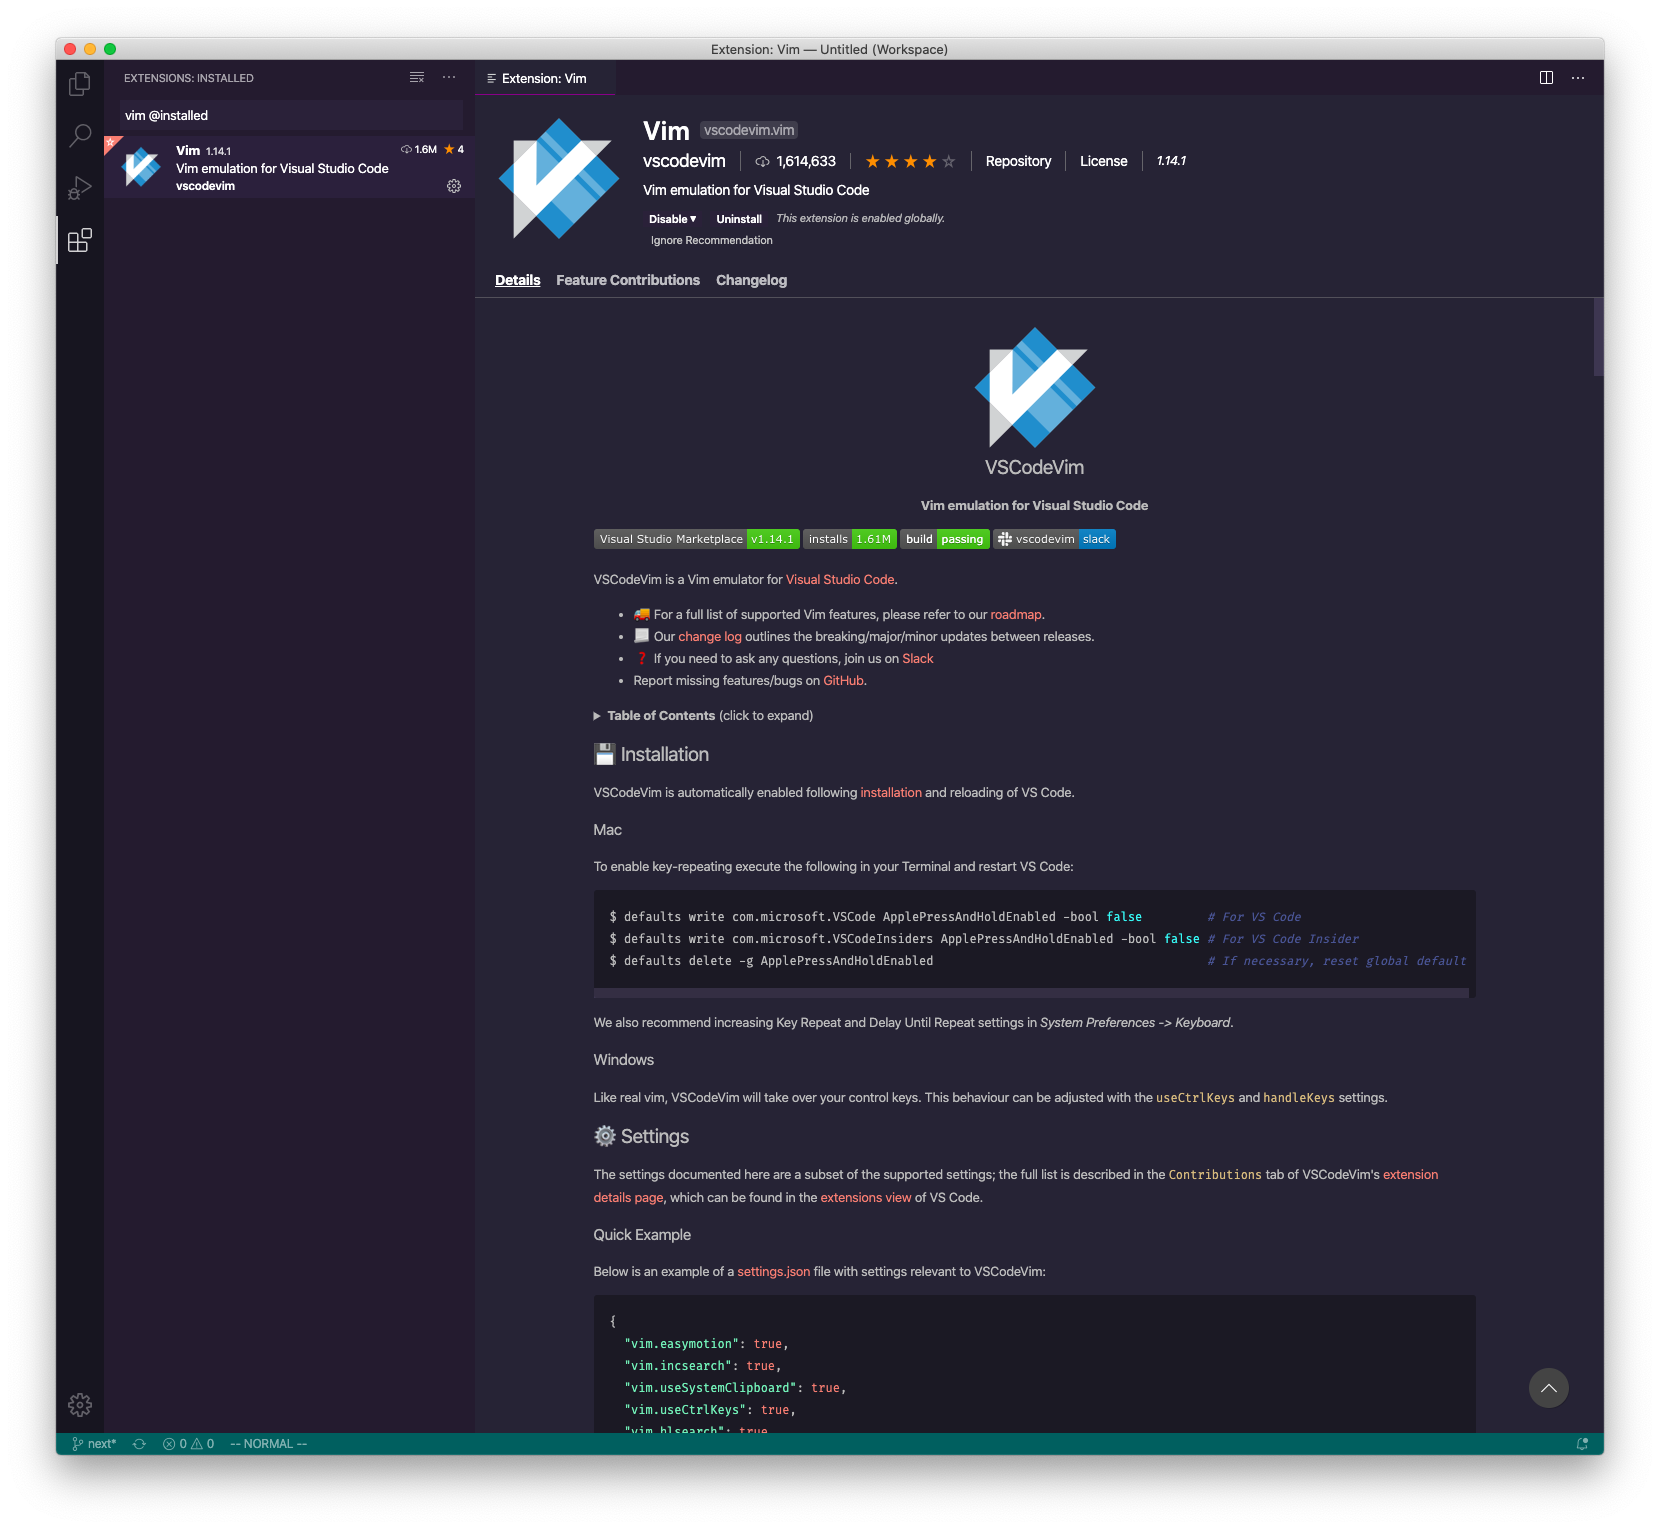
VSCodeVim is a Vim emulator for Visual Studio Code.
Combined with the flexible shortcuts of the IDE itself, VSCodeVim allows me to create and change source code fast - significantly faster than otherwise. The navigation inside and between files is also brilliant.
For a quick overview, check out Using VSCode with the VIM Extension by Richard Bagshaw:
Using VSCode with the VIM Extension by Richard Bagshaw
Some of my favourite and most often used features are:
gdjumps to the definition of the symbol (variable, function, import etc.)ghdisplays the linter warning/error on the current line.- Jump to the line I'm looking at by using relative line numbers and typing something like
15k(15 lines up). - Being able to change code inside parens, curly braces or an HTML/React tag with
ci(,ci{,citrespectively. You can also change the whole block withca(,ca{orcat.
Plus, the usual, basic editing tricks:
- Adding to the beginning or end of a line with
IorA - Adding a new line below or above with
oorO. - Copying, deleting or changing the whole line with
yy,dd,cc - Finding character in the current line with
f, e.g.f(to jump to the next(.
Clicking on Things with Vimac
January 2023: Vimac is now called Homerow
Vimac is a fantastic app by Dexter Leng that allows you to "Stop using your clunky trackpad/mouse now" on Mac OS.
By pressing a shortcut, you're presented with a "hint" to every interactive element on the screen. Next, you tap the hint keys to simulate a mouse click - without touching the mouse! 🐭
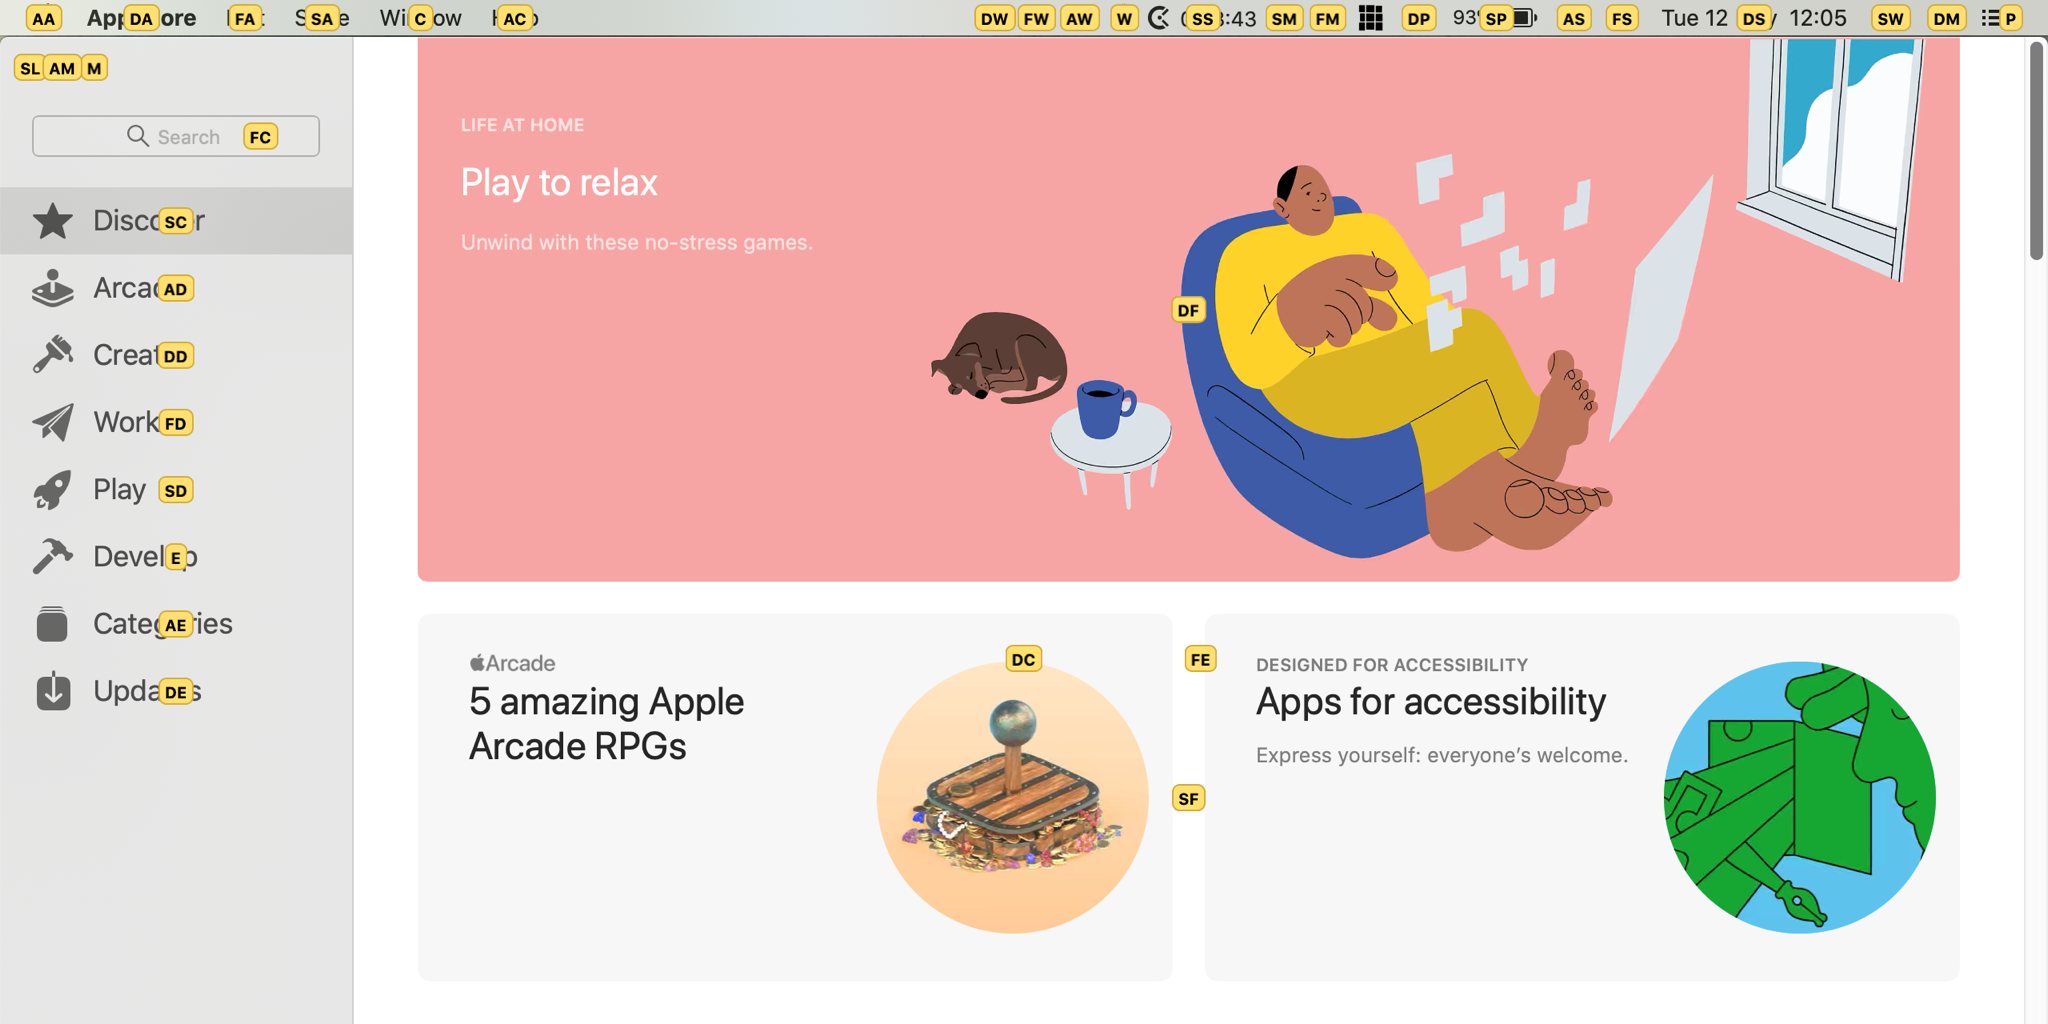
There are modifiers to simulate right-click or ⌘-click, plus you can turn on Vim-like scrolling for lists inside apps.
I strongly encourage you to give this gem a try: homerow.app
XEasyMotion
A little tool I'd also recommend and still use for clicking on the screen is XEasyMotion
It opens a crosshair on your screen so you can click on anything you'd like, even if it's not interactive. You move the crosshair with hjkl by the way 😉

Gif from https://github.com/h2ero/XEasyMotion
Clicking on Internet Things with Vimium
Another spiritual successor of Vim is Vimium - The Hacker's Browser.
Vimium works similarly to Vimac, but inside your browser: after installing the extension for Chrome or Firefox you can press a shortcut - f by default - then type the letters of the hints where you'd like to click.
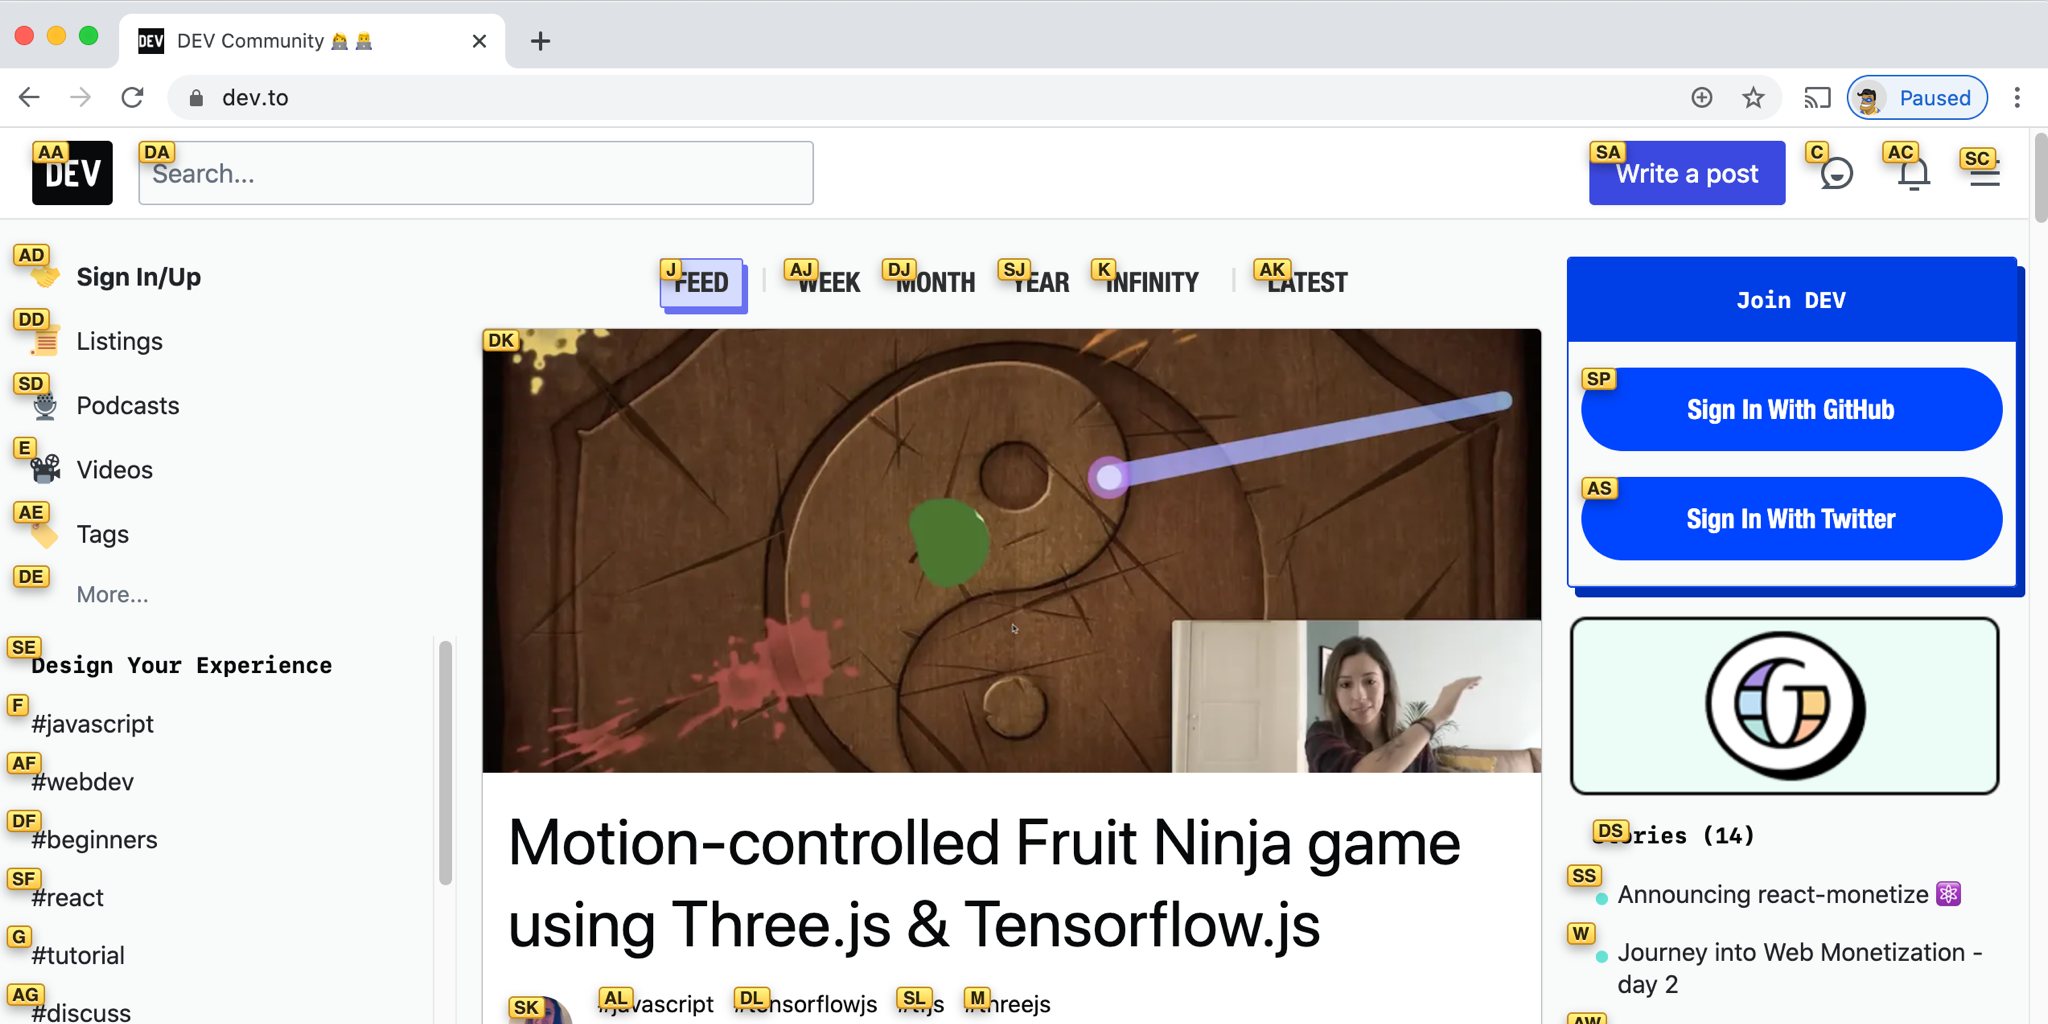
You won't appreciate how easy and comfortable browsing becomes until you give Vimium a try!
Productivity apps
Of course, there are many power tools out there designed to help simplify your life and make you faster. Here are some of my favourites.
Launchbar
Launchbar is an application, file, folder (etc.) launcher with fuzzy search, an elegantly simple interface and a staggering amount of features.
After pressing the designated shortcut, you can start typing the name of the "thing" you'd like to open. Launchbar can naturally open applications, files or folders anywhere on your Mac. Plus, there are many other entities you can manage: contacts, calendar events, bookmarks, search engines, songs, calculations, text snippets, data from 3rd party apps and so on. It's a powerful tool 💪!
LaunchBar – Meet the future of productivity
The features I'm using the most are:
- Opening and switching between apps - it can even replace
⌘+TAB! - Opening files and folders: every file and folder takes the same time to open, just press a few (fuzzy) letters
- Looking up previous clipboard entries and pasting them again and again
- Use ClipMerge to copy multiple things to the clipboard so I can paste them in one go
- Inserting pre-defined text snippets, so I don't have to repeat myself over and over again - and it works in any application
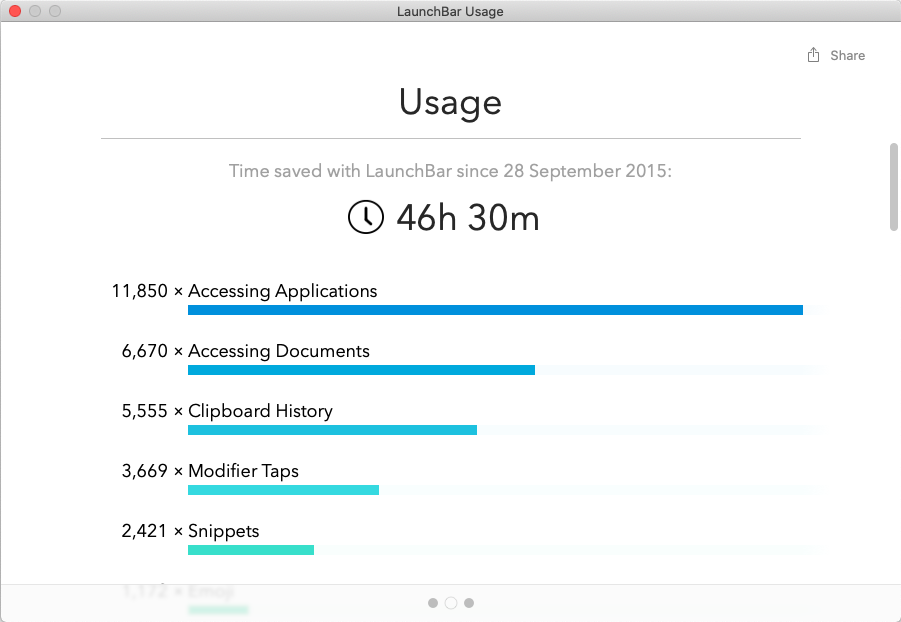
I've been using Launchbar for over five years now. These nano-optimisations seem to add up:
Keyboard Maestro
Finally, a tool that sports a less impressive UX but allows you to automate anything on your computer: Keyboard Maestro
In their own words:
Automate applications or web sites, text or images, simple or complex, on command or scheduled. You can automate virtually anything.
This one is an advanced tool, and the possibilities are truly limitless - at least I couldn't find the limits yet. Just to highlight a few things you can achieve:
- Remap keys
- Record interactions with an app or website and replay it
- Fill out forms
- Click on images on the screen
- Replay activity for screencasting :)
Check out a few tips and use cases in this video:
Keyboard Maestro Review by Jesse Starr
Desktop managers
The way macOS manages windows is just plain annoying. By default, new apps appear at random places, overlapping each other, forcing you to move them manually. We can do better than that!
Rectangle
When on a smaller screen, I've used Spectacle for a very long time. This little tool allows you to snap windows to edges or corners of the screen, or to make them centred or full-screen (and so on), with keyboard shortcuts.
Recently it was announced that Spectacle is not maintained anymore and apparently Rectangle is a great replacement:
Rectangle - macOS window manager
With Rectangle, you can optimise the screen real-estate, de-clutter your desktop and quickly snap new apps to your preferred location, all without touching the mouse. A highly recommended tool!
Amethyst
When working on a large display, like a 34" ultra-wide monitor, I've found even manual window snapping is sub-optimal. So at the moment, I'm running Amethyst - a tiling window manager for macOS.
Essentially, when you run a tiling window manager, instead of manually managing the windows, they are positioned automatically on the screen in tiles (surprise!), so they never overlap.
You can then use keyboard shortcuts to move them around, change the focus etc.
While it takes a little getting used to such a desktop, I've found it to be more comfortable so far than having to worry about manually positioning windows repeatedly.
Do you have any #mouseless tips and tricks you'd share? Let me know!Do you have any #mouseless tips and tricks you'd share? Let me know!